Free Express Shipping
Setting up an IPTV box in the USA is not as complicated as it looks. Most people get it done in under 15 minutes. You plug in a cable, connect to Wi-Fi, enter a URL, and you’re watching live TV. That’s really it.
This guide walks you through every step, plain and simple.
Get these things ready before you begin:
If you have all five, you’re good to go.
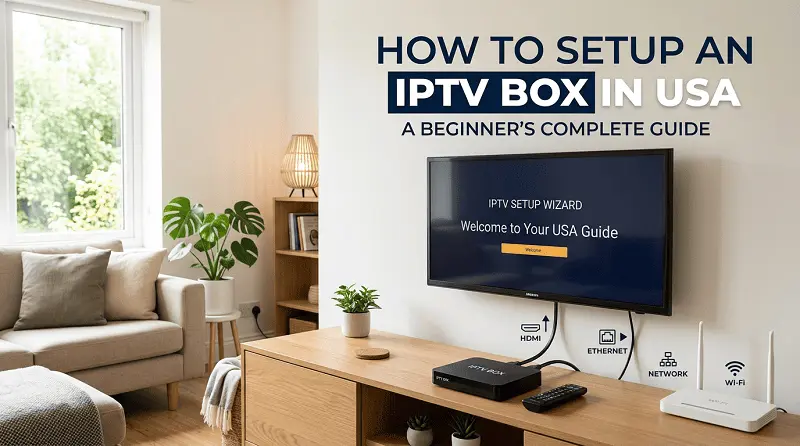
Take your HDMI cable and plug one end into the back of the IPTV box. Plug the other end into any HDMI port on your TV. Connect the power adapter to the box and plug it into a wall outlet.
Turn on your TV. Use your TV remote to switch the input source to the HDMI port you just used. Most TVs label these as HDMI 1, HDMI 2, and so on. Your IPTV box will boot up and show a home screen within a few seconds. When you see that screen, the physical setup is done.
On your IPTV box home screen, go to Settings. Select Network, then choose Wi-Fi.
Pick your home network from the list. Type in your Wi-Fi password. The box will connect and show a confirmation, usually a green checkmark or an IP address on the screen.
If your Wi-Fi signal is weak or your box is far from the router, use an Ethernet cable instead. Just run it from your router directly into the LAN port on the back of the IPTV box. A wired connection gives you a more stable stream with less buffering.
This step is where most beginners feel unsure. It’s actually straightforward once you know what you’re entering and where.
When you subscribe to an IPTV service in USA, your provider sends you activation details. Those details come in one of two formats.
Method A — Portal URL
Open your IPTV app. Common apps include IPTV Smarters, STB Emu, or a built-in portal depending on your box. Find the field that asks for a portal URL or server address. Copy and paste the URL your provider sent you into that field. Save it and the channels will load.
Method B — MAC Address
Some boxes use a MAC address for activation instead of a URL. To find yours, go to Settings, then About or Device Info. You will see a string of letters and numbers labeled MAC Address. Share that with your IPTV provider. They register it on their end and activate your subscription remotely. You do not type anything else. The channels just appear.
If you subscribed to Guru IPTV, your portal URL and activation details are sent instantly after purchase. Their setup is built for US customers and works with most IPTV box models out of the box.
Once your portal URL is saved or your MAC address is activated, open the channel list.
Pick any live channel and press play. If it loads and plays smoothly, your IPTV box configuration is complete.
If channels are not loading or the stream keeps cutting out, check these things first.
Check your Wi-Fi. Go back to Settings and confirm the box is still connected to your network.
Check the portal URL. A single wrong character breaks the whole thing. Look for extra spaces or missing letters. Retype it carefully if needed.
Restart the box. Unplug the power cable, wait 10 seconds, and plug it back in. This fixes most small errors.
If none of that works, contact your IPTV provider directly. Guru IPTV has 24/7 customer support for US customers. They will walk you through it and get your stream running fast.
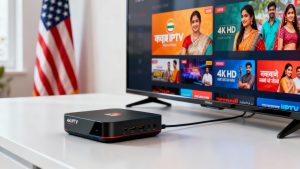
Once your box is set up, you need a subscription to fill it with content. Guru IPTV is built for US users.
Here is what you get:
The setup process with Guru IPTV takes the same steps covered in this guide. You subscribe, get your URL, paste it in, and you are watching live TV within minutes.


Rahul Sharma is a streaming and IPTV specialist with years of experience in testing IPTV services, apps, and subscription providers. He writes easy-to-understand guides and reviews based on real usage to help users choose the best IPTV options.